Thrifty finds are so nifty- How to shop frugally


I’ve been making grand plans for slightly ridiculous and big changes in our living/bedroom. I’ve been wracking my brain for creative furniture arrangements to maximize space and function. Many furniture pieces have made a grand appearance in our house only to make a quick exit because of size, color, shape, or my sometimes fickle design tastes. Even though many new pieces have made an entrance, they’ve been scored for low prices and took some creativity to suit our home just the way we want them to. I thought I would share some of my favorite pieces I’ve scored recently.

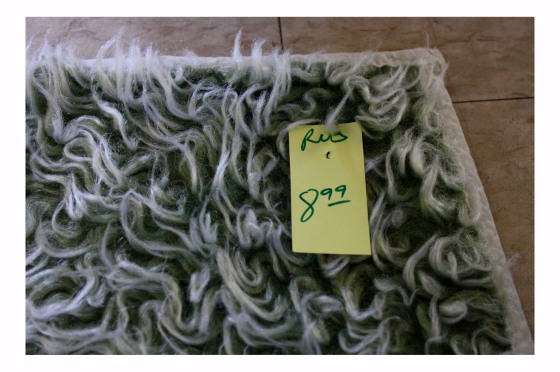
The flooring in our house is quite old, ancient really, and pretty darn ugly. Even though I love putting paint on the walls and spending some dough on furniture, I have to draw the line at replacing the floor in a rental, so we have to make due with some area rugs. So check out this shagadelic rug I picked up at the thrift store around the corner from our house. It was priced at a whopping $8.99, I figured for that price I could give it a try in our house and see if it was totally radical or a complete disaster.

Once I got it to the register it was 30% off! Score, I spent a whole $6.29 on this little gem. Just shaggy enough, super soft and squishy for our little guy’s toes, and a fun shade of celery green! Jack is obviously loving the fun new texture on the floor…

I was recently admiring a vase on this coffee table over at Young House Love, and wanted to find something in similar size and texture for our table. Isn’t their living room gorgeous?

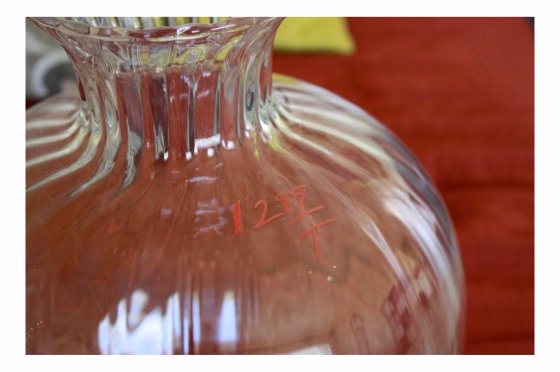
So I perused the glassware section at the thrift store without any real expectation of finding something, when I spotted this vase for $12.99. I was hesitant to spend the full price but knew that it was a really great deal for such a large vase and figured I could splurge a bit….

When I got to the register I asked the woman if there was any price negotiation on home décor items, I figured it couldn’t hurt to ask! She said no. Then the sweet woman said the magic words, “It’s labeled with a ‘T’, which means it is color coded ‘tan’, which happens to be 75% off”. I paid a whole $3.25 for this beauty. Score!

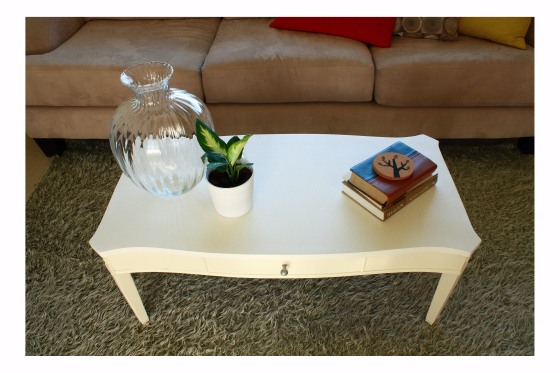
Isn’t the vase lovely on my refinished coffee table and thrifty nifty rug? The entire look cost me all of $29.54. Not too shabby I’d say….

So are there any thrifty finds you’ve managed to nab recently? Feel free to share photos!

-E

Old Made New: How to refinish a coffee table {Tutorial}


I love coming across a piece of furniture with character and personality; aged, flawed, forgotten, unappreciated, and undervalued. Thrift stores, garage sales, craigslist, and curbsides offer up amazing pieces that at first glance might be cast off or ignored, but after a second look their character becomes evident and a new project takes shape.

I found this sweet antique table on craigslist for a mere $20 and turned it into a coffee table with a fresh and chic new look. This gem was drowning under a thick, sticky, and drippy coat of stain and then slathered in, what seamed like, a gallon of shiny lacquer.
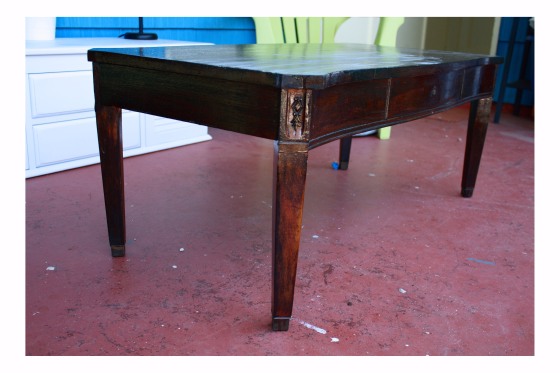
I loved the simplicity of the table with the tapered legs and the slightly rippled edges that gave it a little extra character. Our house houses a somewhat ridiculous amount of Ikea furniture that was beginning to make me feel like I was living in one of their showrooms, so this coffee table was a refreshing find, one that helps break up and eliminate that “matchy matchy” feel in our living room.

So, are you just biting your fingernails in suspense wondering what the “afterlife” for this little table looks like? You’ll have to bite them a little longer because I just have to give you the rundown on the extreme makeover I pulled on this little lady.

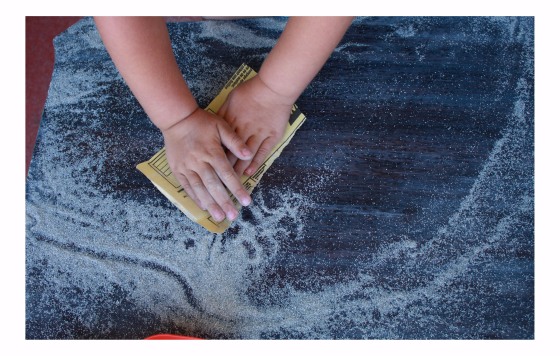
I started off with a plan to simply sand the table to knock down the blinding shine in order to prepare the surface for paint. But once I started to sand it, I realized the ooey and gooey lacquer was holding on for dear life.

Here’s a photo after the initial sanding:

My trusty assistant got in on the job and gave it some serious elbow grease:
I quickly realized I was going to have to call in the big guns in order to truly reveal the beauty beneath the mask of stain and shine…I called a stripper and highered a gun… ok not that kind of stripper or that kind of gun…

I called in some highly toxic and disgusting furniture stripper and my trusty spray gun, oh and some rubber gloves, oh yeah baby. This table was going to take some serious work to get to the bottom of the grime.

Stripper is seriously nothing to mess around with. It is highly toxic to kids and pets and should never be used in their presence as it is not only a chemical that can cause serious burns, but its fumes are atrocious as well. My little guy was bundled up on the couch with his puppy watching a movie while I worked in the backyard with fresh air on this project. ALWAYS wear gloves (and shoes….speaking from experience over here) when working with this stuff.

I sprayed the stripper onto the table top and we got this disgusting and yet so delicious looking (delicious because scraping that nasty stuff off is like frosting a cake) layer of bubbling goo…

Then I got to frost the cake, oh yeah nothing like stripper to make you hungry…and scraped all the gunk from the table.

After some scrubbing and serious scraping I rinsed the table using a stiff bristled scrub brush and hot soapy water. I wanted to make sure I could scrub into the hard to reach places and get all the stripper residue off. Without the hot soapy water some of the stripper might be left behind, resulting in serious bubbling of the paint I was going to refinish the table with.

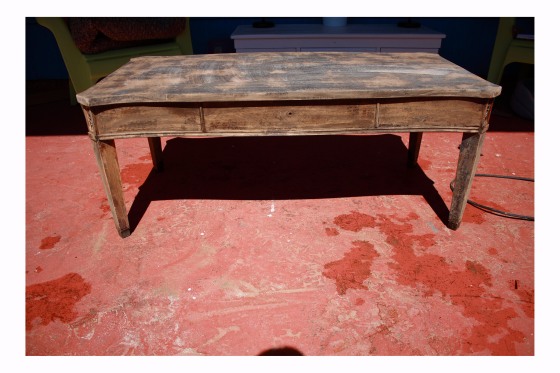
After the table dried in the summer sun I put my grandpa’s ancient electric sander to good use (probably its last project in life as the darn dinosaur died on me at the very end) and sanded the entire table.
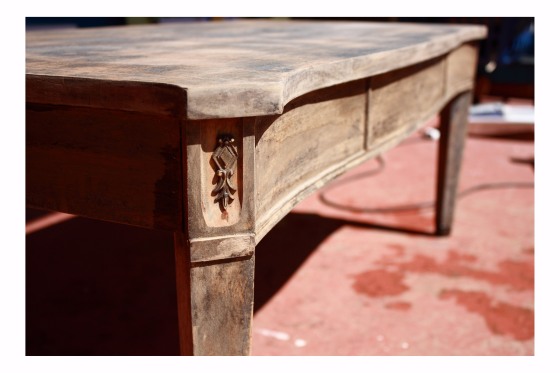
Bare wood antique coffee table

Sigh… isn’t raw wood beautiful? I have absolutely no clue what kind of wood this is, I also didn’t sand completely down to the true rawest part of the wood purely for time’s sake, especially since I was going to paint the table, not re-stain it. If re-staining had been my mission it would have been really important to get every last bit of old stain and lacquer off to ensure an even new coat. But that’s a tutorial for another day, and another piece of furniture!

So, final steps of the project included painting the legs and sides of the table in a vanilla cream color, so warm and inviting. The top of the table is painted a crisp white which makes me think of vanilla ice cream with whipped cream on top… I think I must be hungry.

The Olympic paint line sold at Lowes boasts a zero VOC latex paint that was super wonderful to work with and cost exactly the same price as traditional paint. I was really excited to find the no VOC for so inexpensive. Unfortunately Minwax polyurethane isn’t no VOC, it’s probably double VOC, this stuff smells so bad…but it works wonders.

The table took 2 coats of each color using a ¼” nap mini roller. I wanted the roller to leave a super smooth finish and opted not to use a brush for that very reason. I made sure to do thin coats to eliminate drips or goop between coats. I purchased the paint in a quart size but I think I seriously used a 10th of it, now I’ll have to use the paint on some other project…. picture frames anyone? I finished the table off with a few coats of poly to ensure I could wipe sticky finger prints and toy car tracks off the top when necessary.

And now for the big reveal….. drum roll please….

Gorgeous right? I love it! The fresh cream and white color combination adds so much light to our space and the size of the coffee table is perfectly proportioned to our living room. Major score thanks to craigslist!

So, are there any pieces of furniture in your house that could be completely transformed by a few coats of paint and some elbow grease? Have questions about any of the steps outlined above? Leave a comment!

-E

Mom’s Banana Bread {Recipe and Tutorial}


What could be better then the smell of fresh baked homemade banana bread? The taste of course. What could be better then the taste and smell of such bread? Getting to eat it without having to bake it yourself…

Growing up my mom frequently filled our home with the delicious sights and smells of fresh baked breads, delectable canned jams, sweet pie fillings, and tasty cookies. These beautifully packaged goodies were sent off to friends, family, and new neighbors for special occasions, holidays, and just because moments.

I treasure the memories I have of baking and tasting each batch of homemade goodness, preparing and packaging each bundle with care, and delivering a handmade and very much home loved gift to a friend or family member.

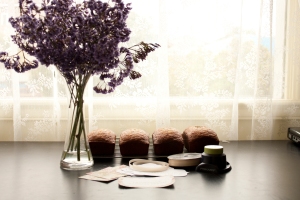
So, as a little tribute to my amazing mom, and as a sweet opportunity to bless our wonderful neighbors, Lucas and I baked up a few batches of warm, mouth-wateringly yummy banana bread. In true homage to my childhood memories, I had to package these goodies up with some flare. Enjoy the little “how to” tutorial below, maybe these almost edible photos will inspire you to give it a try and bless someone in your life with some homemade goodness!

Banana Bread Recipe:

2 1/2 C flour
1 t salt
2 t baking soda
1 C Margarine or butter
2 C sugar
2 C mashed ripe bananas (4-6)
4 egss, slightly beaten

Added options: walnuts, dried cranberries, candied almonds, chocolate chips

Baking Instructions

1. Preheat oven to 350°
2. Grease and flour baking pan (*muffin tins or bread pan)
3. Combine flour, salt, baking soda – set aside
4. In a large mixing bowl, combine margarine, sugar and eggs, belnd well. Add bananas and blend well.
5. Add flour mixture to the banana mixture until thoroughly blended. Batter may be lumpy from bananas.
6. Pour into prepared pan or muffin tins.
Bake until center is done when checked with a wooden skewer.
7. Baking times for full recipe:
4 mini loaf pans : 45 minutes
24 mini muffins : 15-17 minutes
18 large muffins : 25 minutes
2 loaf pans: 65-70 minutes

NOTES:
Muffins and bread will turn a very dark brown. Check center for doneness. Remove from oven and cool for 5-10 minutes before inverting.

Ripe bananas can be tossed in the freezer for months, peels and all until ready to use, Just simply defrost.

Packaging:

Materials:

Wax paper

Ribbon (or jute, twine, string, anything you want to tie the loafs with)

Patterned Paper

Scissors

Corner Punch

Instructions:

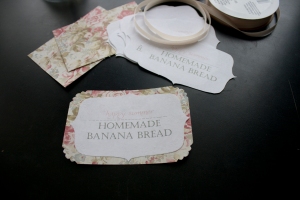
1.) Make labels. I baked mini loafs for our neighbors so my gift tags/labels measured 2.5” x 2”. I cut the labels to a size I liked atop the loaves but you can make them any size that you like. I also pre-printed “Happy Summer: Homemade Banana Bread” using Microsoft Word because I don’t particularly care for my own handwriting.

I layered the pre-printed label onto some rose printed paper I had in my stash then punched the corners using my favorite corner punch.

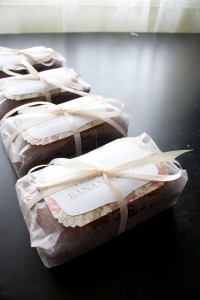
3.) Wrap each loaf in a sheet of wax paper just like you would wrap a gift. Wax paper is perfect for use as food gift wrap as nothing will stick to it and your loaves will stay perfectly moist in it.

4.) Tie each wrapped loaf like you would a gift and stick your label under the tie to hold in place. I used some quarter inch ivory satin ribbon but jute twine, thread, or other materials would look equally perfect.

5.) Deliver your packages! Lucas and I walked around our little circle to each of our 3 neighbors homes and handed them each 2 loaves of bread.

It was a perfect afternoon of baking with my little guy, sharing special memories, and blessing our neighbors with something homemade. Not a penny was spent to make these loaves as we already had everything on hand- such a small investment in loving on our neighbors.

How can you bless your neighbor today?

-E